
Starter strips are small, simple, and easy to overlook. Yet they protect the most vulnerable parts of your roof. In Upstate NY, where wind and ice work hard, they matter even more. If you care about roof life, edge leaks, and warranty protection, start with the starter strip.
You want clear, local guidance. You want work that holds up through snow squalls, freeze-thaw cycles, and spring winds. This guide explains what starter strips do, where they go, why they fail, and how to get them installed right the first time. If you need help from a proven local team, Elite Contracting can inspect and advise.
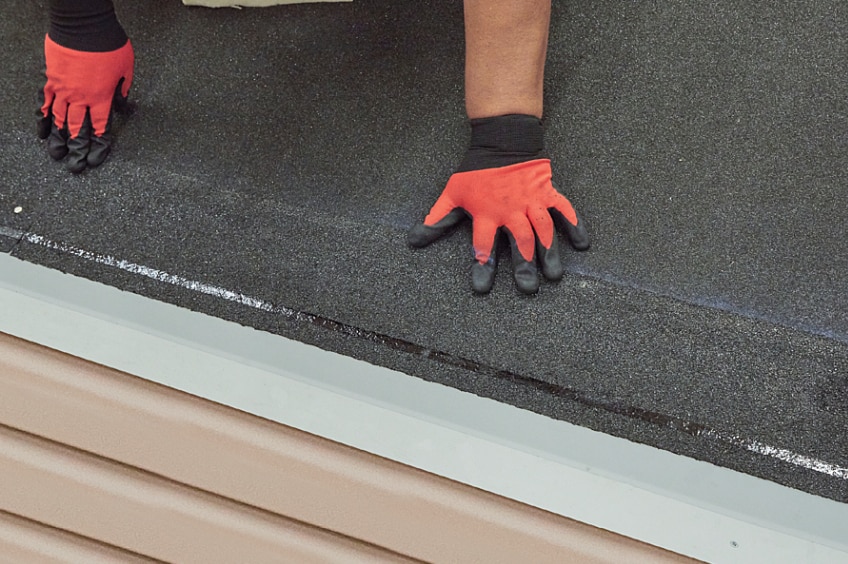
What a Starter Strip Is and Where It Goes

A starter strip is the first course at the roof edge. It sits under the first exposed row of shingles. It provides a straight, sealed base at the eaves and rakes. It also helps lock the first shingle course against wind lift.
Typical facts:
- Material: factory starter shingles or field-cut strips from three-tab shingles
- Location: eaves first, then rakes, along the entire edge
- Adhesive: starter adhesive strip faces the edge to bond with the first shingle course
- Integration: overlaps drip edge and underlayment per manufacturer specs
The goal is simple. Create a straight, sealed line that resists wind and sheds water.
Why This Small Strip Does Big Work
Wind resistance at the eaves and rakes
Most shingle blow-offs start at the edge. Starter strips add a continuous adhesive line below the first course. This line grips and stops uplift. It reduces the chance of a chain reaction during a storm.
Water control at the edges
At the edge, water moves fast. Ice and snow melt, then refreeze. Starter strips create a tight seal. Water is directed onto the drip edge and into gutters. This limits backflow under the first shingle course.
Seal and shingle placement
Starter strips set a straight edge. This controls the alignment of the first visible course. A straight first course gives you a straight roof. It also reduces gaps where wind and water can enter.
Common Starter Strip Mistakes That Cost You
- Missing strips at rakes. Without them, wind catches shingle edges.
- Wrong orientation. Adhesive facing the wrong way does not bond.
- Short coverage. Gaps at corners invite leaks and lift.
- Reused or brittle strips. Old material will not seal.
- No seal at cold temps. Adhesive needs proper surface and temperature or manual sealing.
- Misaligned starter. A wavy edge leads to wavy shingles.
What It Costs to Ignore Starter Strips
Skipping starter strips or doing them wrong is not a small miss. It creates predictable failures.
- Early shingle failure. Wind lift starts at the edge and propagates up-field.
- Water intrusion at the eaves and rakes. Stains, sheathing rot, and mold risk.
- Ice dam backflow. Water can track under the first course during thaw.
- Warranty issues. Many manufacturers require starter strips for coverage.
- Failing inspection. Buyers and insurers look at edges first.
Consider a simple example. A 25-square roof loses a few shingles after a 50 mph wind event. Repair might seem small. But repeated stress at the edge accelerates granular loss and fastener fatigue. A correct starter strip line would have limited the uplift. The difference adds years of life.
Proper Installation: How Pros Do It
A professional install is consistent. It follows local code and manufacturer instructions. It respects the weather.
Placement
- Install drip edge first at eaves. Then ice and water shield laps over the drip edge as required by local code.
- Set factory starter strip along eaves with adhesive near the drip edge.
- Stagger joints at least 4 inches from the first-course shingle joints.
- Repeat at rakes with proper overhang and straight alignment.
Alignment
- Snap a chalk line. Keep it straight.
- Check overhang. Typically 1/4 to 3/8 inch past drip edge, per shingle brand.
- Trim ends clean at valleys and corners.
Adhesive and fastening
- Use the factory adhesive strip. In cold weather, consider hand-sealing per specs.
- Fasten with galvanized roofing nails at the correct line and depth.
- Avoid overdriven nails. They cut the mat and reduce hold.
If your crew follows these steps, you get a tight edge and fewer callbacks. When you compare bids from roofing contractors Albany, ask for this process in writing.
Upstate NY Conditions: Ice, Wind, and Freeze-Thaw
Albany and the greater Capital Region see lake-effect winds, heavy snow, and wide temperature swings. These local factors raise the bar for edge detailing.
- Ice dams. Exhaust heat and sunny winter days cause melt. Proper starter strips and ice barrier limit backflow at the eaves.
- Gusty spring storms. A continuous adhesive line helps prevent edge lift during sudden gusts.
- Freeze-thaw cycles. Water expands and contracts. A clean seal reduces intrusion at nail lines.
- Leaf loads. Clogged gutters hold water at the eaves. A tight edge helps shed water forward.
These are not rare events. They happen every year. Your edge system must assume they will occur.
Spotting Trouble: Visual Signs of Missing or Poor Starter Strips
- Wavy first course. The bottom edge looks uneven or scalloped.
- Lifted shingle corners at edges. Shingles flutter or look proud.
- Edge leaks. Water marks on soffits or fascia after storms.
- Granule piles at eaves. Excess runoff and abrasion at the roof edge.
- Exposed sheathing or felt at the edge. Overhang is short or inconsistent.
- Frequent nail pops near the eaves. Moisture and movement at the edge.
If you see these signs, request a roof edge assessment. Many fixes start with removing the first course, adding proper starters, and reinstalling to spec.
Resale Value, Inspections, and Insurance
Home inspectors and adjusters check edges first. Clean lines and correct materials show quality. Sloppy edges trigger more probing. That can affect sale price and closing timelines.
- Pre-listing check. Confirm starter strips at both eaves and rakes.
- Documentation. Keep product data and install notes for buyers.
- Insurance. Strong edge detailing can reduce storm claims and premium pressure over time.
The edge sets the tone. A crisp starter line shows the whole roof was done with care.
Starter Strips and Advanced Roof Systems
Asphalt roofs rely on starter strips. Metal roofs use different edge details, but the principle is the same. Control wind, water, and movement at the perimeter. If you are considering an upgrade, study how metal systems treat eaves and rakes with starter trim, cleats, and hemmed edges. For ideas that match Upstate NY homes, see modern metal roofing ideas for homes.
Local Expertise Pays Off
Edge details deliver outsized value in our climate. Look for installers who design for wind exposure, snow load, and ice. The right contractor explains the edge build and puts it in writing. See how better planning can boost long-term value in this guide on increasing home value with a roofing company in Albany NY.
When you review bids from roofing contractors Albany, compare the edge steps, materials, and warranty terms line by line.
Why Roofing Contractors Albany Trust Starts With Details
Details drive roof performance. Starter strips prove it. A perfect field install can still fail if the edge is weak. That is why proven crews focus on the first course. They snap lines, manage overhang, hand-seal in cold, and validate adhesion before they leave.
If you work with roofing contractors Albany who document these steps, you lower risk. You also protect your warranty and resale value.
What to Expect From a Qualified Contractor
- Permits. Pull required permits and follow local code.
- Product match. Use manufacturer-approved starter strips for the chosen shingle line.
- Edge sequence. Install drip edge, ice barrier, starter strips, then shingles.
- Warranty. Provide manufacturer and workmanship coverage in writing.
- Weather plan. Hand-seal cold-weather edges when bonding conditions are poor.
- Clean drift prevention at eaves. Keep cuttings, granules, and sealant drips out of gutters and off fascia.
- Pad placement. Protect landscaping and driveways with ground pads, and use ladder pads to avoid gutter damage.
- Final check. Verify straight lines, proper overhang, and adhesion at all edges.
Budgeting Right From Day One
Starter strips are a small line item with large leverage. Expect modest material cost, but plan for quality. The price difference between correct and poor edge work is small. The cost difference in outcomes is large.
Ways to save without cutting corners:
- Use factory starter strips for consistent adhesive performance.
- Bundle work. Replace gutters or drip edge with the roof to avoid extra trips.
- Choose a crew that hand-seals in cold conditions. Fewer callbacks reduce total cost.
- Document brand and method. This helps warranty claims and resale.
Small details at the edge protect the entire roof investment.
Quick Diagram: Eave Edge Layers
Roof field shingles
First exposed shingle course
Starter strip  | adhesive line near drip edge for bond
Ice & water shield  | eave protection under starter
Drip edge metal  | laps under ice barrier at eaves
Fascia  | gutter attached below drip edge
This simple stack controls water and wind at the weakest point of your roof.
Problem, Result, Fix: Edge Issues at a Glance
| Issue | Result | Fix |
|---|---|---|
| No starter at rake | Wind gets under shingles | Add starter with correct overhang and nails |
| Adhesive facing wrong way | No bond to first course | Reinstall with adhesive at edge |
| Short overhang | Water tracks behind fascia | Reset to 1/4 to 3/8 inch overhang |
| No hand-seal in cold | Lifted corners after freeze-thaw | Apply hand sealant per brand spec |
| Reused brittle material | Cracks and leaks | Replace with new factory starter |
Checklist: Evaluate Your Roof Edge
- Do you see a straight line at the bottom of the shingles?
- Is overhang consistent at 1/4 to 3/8 inch?
- Are there starter strips at both eaves and rakes?
- Are shingle corners flat and bonded at the edge?
- Any staining on soffits or fascia after rain?
- Are gutters clear and free of granule piles?
- Do you have product and warranty documentation?
If you answer no or see issues, schedule a focused edge inspection. A small repair may prevent a big problem.
FAQs
Can I skip starter strips if I hand-seal the first course?
No. Most manufacturers require dedicated starters for warranty and performance. Hand-seal is a supplement, not a substitute.
Do I need starters at the rakes too?
Yes. Rake edges face side winds that lift shingles. Starters with adhesive at the rakes help resist that force.
Are field-cut starters fine?
Field-cut strips can work if done right. Factory starters offer consistent adhesive placement and save time. Many pros prefer them.
Will starter strips stop ice dams?
No single component stops ice dams. Starters help seal the edge. Combine with attic insulation, ventilation, and ice barrier.
How do I know if mine were installed correctly?
Look for straight lines, proper overhang, and bonded shingle corners. A trained inspector can confirm layering and fasteners.
What if temperatures were below 40 degrees on install day?
Ask if the crew hand-sealed the edge and confirmed adhesion. Some adhesives need warmth to activate without help.
When should I replace starter strips?
They are replaced with the roof. If the edge is failing early, targeted repairs may be possible.
Conclusion
Starter strips set the tone for your entire roof. They lock down edges, control water, and protect warranties. In Albany and across Upstate NY, that edge is tested every season. Demand clear methods, factory materials, and documented steps. If you want a straight answer and a strong edge, schedule a roof edge assessment with Elite Contracting today.