If you’re spotting water stains near your fireplace, peeling paint by the chimney, or ice damming along the eaves, you may be dealing with a chimney flashing issue. Flashing is the protective metal system that seals the joint where your chimney meets your roof—a notoriously leak-prone area on Albany and Capital Region homes. In this in-depth guide, you’ll learn how flashing works, why it fails, what you can check safely, and when it’s time to call a pro. For comprehensive inspections, repairs, and replacements—including complex chimney tie-ins and custom metalwork—Elite Contracting brings local expertise grounded in Upstate New York weather and building practices.
We’ll also cover how flashing behaves on different roofing systems, including modern metal roofs. Whether you’re comparing materials or planning an upgrade, understanding your options can save you thousands by preventing hidden damage. If you’re considering an upgrade or repair, you can explore metal roofing Clifton Park solutions that integrate well with durable chimney flashing and snow-management details.
What is chimney flashing, and how does it actually stop leaks?
Chimney flashing is a system of metal components that bridge and seal the gap between your roof surface and the masonry chimney. Without it, rain, snowmelt, and wind-driven water would easily slip beneath shingles or panels and into your home. When properly designed and installed, flashing creates a layered, water-shedding assembly that stays watertight through the Capital Region’s freeze–thaw cycles.
What are the main parts of a complete flashing system?
- Base flashing (or step flashing): Interleaved metal pieces that tuck under shingles along the chimney’s sides, guiding water back onto the roof surface.
- Counterflashing: Metal that overlaps the base flashing and anchors into the chimney mortar joints or reglet cut, covering the top of base flashing for a watertight seal.
- Apron flashing: Installed at the front (downslope) face of the chimney to handle direct water flow.
- Back pan (and cricket/saddle): A wide, upslope flashing piece; on wider chimneys a triangular “cricket” splits and redirects water and snow around the structure.
- Sealants and fasteners: High-quality masonry sealant, stainless or coated fasteners, and sometimes high-temp underlayment to add redundancy.
Why does chimney flashing fail in Albany’s climate?
Flashing fails for a few predictable reasons—often a combination of age, poor design, and weather stress:
- Age and corrosion: Aluminum oxidizes; galvanized steel can rust if the zinc layer is compromised; even copper can fatigue at joints over decades.
- Installation errors: Surface-mounted counterflashing without a proper reglet cut; missing back pan; inadequate overlap; incorrect step flashing size; or excessive reliance on caulk rather than proper metal layering.
- Movement and freeze–thaw: Chimney masonry, framing, and roofing materials expand and contract at different rates, opening gaps at seams. Freeze–thaw cycles widen cracks and expose fasteners.
- Mortar deterioration: Failing mortar joints let counterflashing loosen or lift, allowing water to get behind it.
- Storm damage and wind uplift: High winds and drifting snow can dislodge flashing edges or tear shingles around the chimney.
- Ice dams: Ice backing up above the flashing forces meltwater under laps, especially where ice-and-water shield is missing.
Which flashing materials last longest, and what are typical failure rates?
Not all flashing is created equal. Here’s a quick comparison of common materials used around Capital Region chimneys, combining typical service life, weather resistance, and estimated 10-year failure likelihood when installed correctly. Actual performance varies based on installation, roof pitch, exposure, and maintenance.
| Material | Typical Service Life | Weather/Corrosion Resistance | Common Failure Causes | Estimated 10-Year Failure Rate (Upstate NY) |
|---|---|---|---|---|
| Galvanized Steel | 15–25 years | Moderate (zinc layer can wear) | Rust at cuts, poorly coated fasteners, seam fatigue | 15–25% |
| Aluminum | 20–30 years | Good (oxidizes slowly) | Galvanic reactions, punctures, thin gauge bending | 10–20% |
| Copper | 40–70+ years | Excellent (patinas over time) | Improper soldering, incompatible fasteners | 5–10% |
| Lead (less common today) | 30–50 years | Excellent malleability | Health/sourcing concerns, creep over time | 5–10% |
| Stainless Steel | 30–50 years | Excellent corrosion resistance | Cost, fabrication complexity | 5–12% |
| Rubber/PVC Boots (adjacent penetrations) | 10–20 years | Fair (UV/temperature sensitive) | Cracking, UV degradation, improper pitch | 20–35% |
What leak warning signs should Albany homeowners never ignore?
Water is relentless. The earlier you catch a flashing problem, the less damage you face. Watch for:
Infographic: 9 signs of chimney flashing failure
- 🚩 Brown or yellow ceiling stains near the chimney chase
- 🚩 Bubbling or peeling paint on walls by the fireplace
- 🚩 Damp or musty smell in the attic or around the hearth
- 🚩 Drip sounds during or after rain
- 🚩 Rust streaks on the chimney or nearby roof panels
- 🚩 Cracked/missing mortar where counterflashing meets brick
- 🚩 Loose or lifted flashing edges visible from the ground
- 🚩 Ice buildup around the upslope side of the chimney
- 🚩 Granule loss or deformed shingles near the chimney
How can you inspect the chimney area safely without going on the roof?
Visual checks from the ground and attic can reveal a lot. Stay safe and avoid roof walking if you’re not trained.
- From the ground with binoculars: Look for lifted metal at the chimney base, gaps in the step flashing line, or missing mortar around counterflashing.
- From the attic: During daylight, turn off lights and look for pinholes of light around the chimney chase. Check sheathing for dark stains, soft spots, or mold. Inspect insulation for dampness.
- After rain or thaw: Re-check for fresh moisture, drips, or musty odor.
- Photograph issues: Take clear photos to document before calling a contractor.
How does Albany’s weather impact chimney flashing over the seasons?
Our four-season climate puts flashing to the test. Frequent freeze–thaw cycles, lake-effect snow, and spring downpours all add stress. This simple visualization shows relative seasonal risk levels for flashing stress in the Capital Region.
Months:  J  F  M  A  M  J  J  A  S  O  N  D
Risk:    8  9  7  5  4  3  3  3  4  6  7  8
Trend:   ^^^^^ winter peak — summer low — autumn ramp-up
What drives the peaks?
- Winter (Dec–Feb): Freeze–thaw cycles, wind uplift, and ice dams push water under flashing laps.
- Early spring (Mar–Apr): Rapid melt and heavy rains exploit any small gaps opened by winter movement.
- Autumn (Oct–Nov): Leaf debris and early freezes test drainage and sealant flexibility.
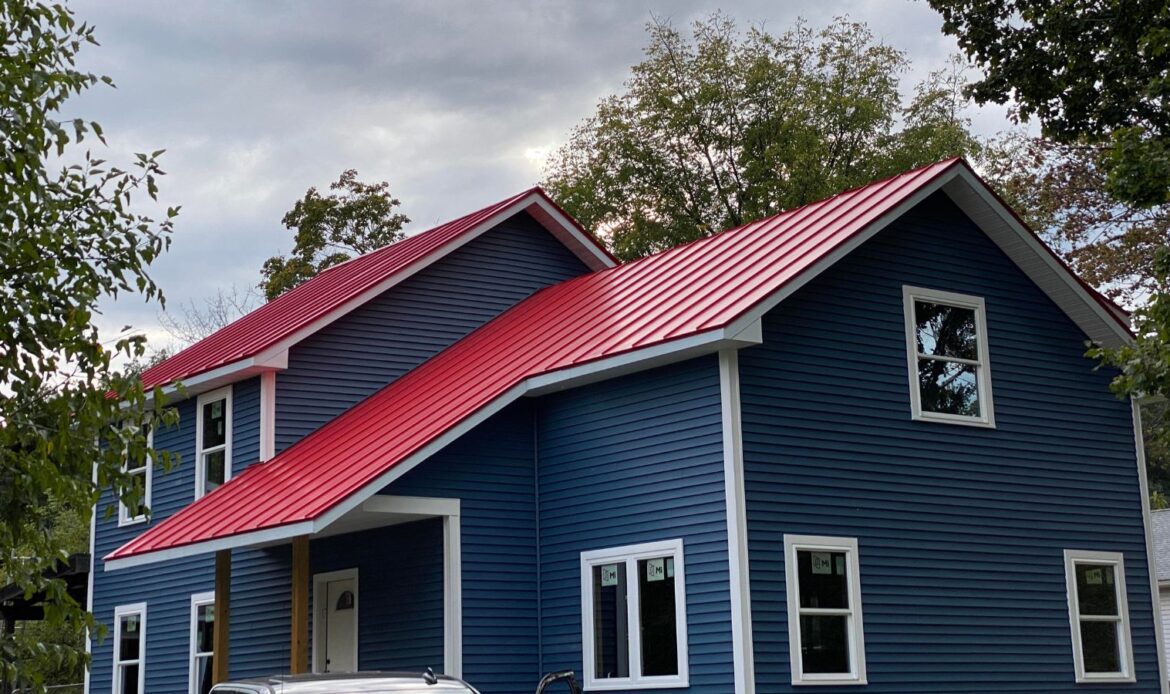
How does metal roofing Clifton Park handle chimney flashing?
Metal roofing expands and contracts more noticeably than shingles, which makes flashing details even more critical. Properly engineered chimney flashings on metal roofs use high-quality metals (often stainless or copper), continuous back pans, and reglet-cut counterflashing to handle movement without opening gaps.
- Thermal movement: Panel expansion across seasons requires slip details and non-binding fasteners near the chimney.
- Snow-shedding: Metal sheds snow quickly. A well-built cricket and, where appropriate, snow guards protect the chimney flashing from sliding ice loads.
- Underlayment upgrades: High-temp ice-and-water shield around chimneys is a must for redundancy.
- Material pairing: Avoid galvanic corrosion by matching metals and using compatible fasteners.
If you’re evaluating a re-roof or a targeted chimney fix on a standing seam or ribbed panel system, consider consulting a local specialist with both masonry and metal experience. Learn how metal roofing Clifton Park solutions can be paired with robust chimney flashing, crickets, and snow retention to reduce long-term leak risks.
What are the dangers of delaying flashing repairs?
Small flashing defects rarely stay small. Delays can multiply costs and health risks:
- Mold and mildew: Persistent moisture in attics and walls creates unhealthy indoor air.
- Insulation damage: Wet insulation loses R-value, raising energy bills.
- Sheathing and framing rot: Long-term leaks compromise structural integrity.
- Masonry deterioration: Water intrusion accelerates brick spalling and mortar failure.
- Interior finishes: Stains, bubbling paint, and ceiling repairs add up quickly.
- Electrical risks: Moisture near wiring is a safety hazard.
- Insurance complications: Deferred maintenance can limit coverage for resulting damage.
What roofing upgrades make sense when you’re replacing flashing?
Upgrading the flashing area is an opportunity to harden the entire roof–chimney interface:
- High-temp ice-and-water shield: Extend 3–6 feet around the chimney and upslope.
- New cricket/saddle: Required on wider chimneys; reduces snow/ice buildup and deflects water.
- Reglet-cut counterflashing: Best practice for long-term seal versus surface-mounted trims.
- Masonry tuckpointing: Repack deteriorated mortar joints before setting new counterflashing.
- Step flashing reset: Replace or properly interleave along the chimney’s sides.
- Sealant specification: Use high-grade, chimney-rated sealants as a secondary defense—not the primary.
Explore the performance, wind ratings, and curb appeal of today’s leading architectural shingles. Read the Benefits of GAF shingles here: Benefits of GAF shingles.
Repair or replace: What’s right for your roof and chimney?
The best choice depends on damage extent, roof age, and chimney condition. Use this quick decision guide:
- Choose repair if: the roof is relatively young; damage is isolated to a small flashing section; mortar is sound; and there are no signs of widespread rot.
- Choose partial rebuild if: counterflashing is loose on multiple sides; mortar joints are failing; or the back pan/cricket is missing and recurrent leaks are documented.
- Choose full replacement if: the roof is nearing end-of-life; more than 20% of flashing is compromised; chimney masonry needs tuckpointing; or you’re re-roofing anyway.
Often, the most economical long-term fix is to replace the flashing during a re-roof, when shingles or panels are already being removed. This allows perfect integration, new underlayments, and correct cricket fabrication.
How do winter ice and snow affect flashing in Upstate NY?
Ice and snow are the toughest seasonal tests for flashing:
- Ice dams: Warm attic air melts snow, water runs downslope, refreezes at colder eaves, and backs up. Without robust flashing and underlayment, meltwater finds its way inside.
- Snow load and drift: Chimneys can create wind eddies that pile snow. A properly sized cricket splits the load and keeps water moving.
- Freeze–thaw pumping: Water expands as it freezes, prying open tiny gaps around flashing edges and in mortar joints.
How can you maintain the area and prevent future leaks?
- Annual roof checks: Inspect after winter and after major storms.
- Clear debris: Keep leaves and sticks from building up against the chimney.
- Trim overhanging branches: Reduce debris and wind-driven rubbing on the roof.
- Attic ventilation and insulation: Helps minimize ice dams and moisture.
Not sure where to start? Use this homeowner-friendly checklist to stay ahead of problems: Roof maintenance checklist.
What does a professional chimney flashing assessment include?
A thorough local evaluation should cover:
- Roof surface inspection: Shingles or panels around the chimney, step flashing alignment, and back pan condition.
- Counterflashing and mortar: Check for reglet-cut vs. surface-mount details and mortar stability.
- Cricket geometry: Confirm height and width are adequate for your roof pitch and chimney width.
- Underlayment checks: Verify high-temp ice-and-water coverage.
- Attic and interior: Moisture mapping, sheathing probing, and insulation checks.
- Documentation: Photos and a written plan with options (repair, partial rebuild, full replacement).
How to budget for chimney flashing work in the Capital Region?
Costs vary widely with material choice, roof type, access, chimney width, and needed masonry work. While exact pricing requires an on-site visit, budget tiers often look like this:
- Minor repair: Re-secure small sections, seal laps, touch-up mortar—best for recent, localized issues.
- Mid-scope: New counterflashing and step flashing on one or two sides, tuckpointing, and sealing.
- Full replacement: Complete flashing system with new back pan and cricket; best with re-roofing or for end-of-life roofs.
- Metal roof details: Expect higher precision labor and premium materials for movement and snow-shedding demands.
Ask for a detailed scope, materials list, and workmanship/warranty specifics, especially for complex chimney geometries.
Where does shingle choice fit into the equation?
Your roof covering and flashing must work as a system. High-quality shingles improve water shedding and wind resistance around the chimney. If you’re planning a broader upgrade, review the Benefits of GAF shingles to see how impact resistance, algae protection, and robust nailing zones can help the assembly perform in Upstate NY conditions.
When is it smart to consider a roofing system upgrade?
Consider a broader roof upgrade if your roof is nearing end-of-life, if you’ve had recurring leaks, or if you want to incorporate snow-management features like crickets and guards. Explore how metal roofing Clifton Park projects integrate advanced flashing details, high-temp membranes, and long-life materials to extend service life.
FAQs: What Albany homeowners ask most about chimney flashing
How long should chimney flashing last?
With quality materials and proper installation, 20–30 years is typical for aluminum or galvanized steel; copper and stainless can last much longer. Severe weather exposure, roof pitch, and maintenance all influence lifespan.
Can I just caulk over a flashing leak?
Caulk is a temporary stopgap. It can seal a minor gap short-term but won’t fix underlying design or metal failures. Durable repairs require proper metal overlap, fastening, and (ideally) a reglet-cut counterflashing.
Do I need a cricket behind my chimney?
Usually yes for wider chimneys (commonly 30 inches or more). Crickets split water and snow, minimizing ponding and ice pressure. Building codes and best practices often call for them in snow-heavy regions.
Will new flashing solve ice dam leaks?
Proper flashing helps, but ice dams are often driven by attic heat loss and ventilation. Pair flashing upgrades with insulation and ventilation improvements—and high-temp underlayment—to prevent backups.
How do metal roofs change the approach?
Metal roofs demand expansion-friendly details, slip joints, premium metals, and reinforced back pans/crickets. Fasteners and metals must be compatible to prevent galvanic corrosion.
Is it cheaper to fix flashing now or wait until re-roofing?
If leaks are active, fix them now. Water damage spreads quickly. If the roof is near replacement, a temporary stabilization may make sense, followed by a full flashing system replacement during the re-roof.
What about warranties?
Material warranties depend on the manufacturer; workmanship warranties depend on the installer. Ask for both, and confirm that chimney flashing details are explicitly included.
Can I do this myself?
Safe access, sheet metal fabrication, masonry work, and integration with roofing systems make chimney flashing a pro job. Incorrect DIY installs often cost more to fix later.
What’s your next step if you suspect a chimney flashing leak?
Document visible issues, check the attic after the next rain or thaw, and consult a local roofing specialist for a full assessment. If you’re also exploring roofing upgrades, learn how metal roofing Clifton Park can pair with long-lasting chimney flashing for a durable, weather-ready system.
Conclusion: Ready to stop chimney leaks before they spread?
Chimney flashing is one of the most important—and most overlooked—parts of a watertight roof in Albany and the surrounding Capital Region. Understanding how it works, spotting early warning signs, and choosing the right materials can protect your attic, insulation, and ceilings from costly damage. If you’re seeing stains, smelling musty odors, or noticing loose metal around the chimney, don’t wait for the next thaw or downpour to make the problem worse. Schedule a professional evaluation and get a clear, actionable plan for repair or replacement with Elite Contracting.